11 Ways To Identify Metals for Welding (Plus per Metal Identification)
Often, you may want to repair or start a welding project with unknown metals. Knowing how to identify metals is essential to prevent serious mistakes. First, let’s see the overview.
You can identify metals by examining their external and internal appearance, weight, sound, and their service conditions. After that, you can do a magnet, hardness, spark, oxyfuel, and flame test. Finally, you can use high-accuracy metal identification kits.
In the first part of the article, you will learn 11 identification methods to know what type of metal you’re using.
- Identify metals by their appearance
- Feel the metal’s weight
- Hear the sound of the metal
- Consider the metal’s service conditions
- Use a magnet on the metal
- Do a hardness test
- Grind the metal to observe the sparks
- Use oxyfuel equipment to identify the metal
- Do a flame test
- Do simple chemical tests
- Use metal identification kits
In the second part, you can learn the most practical methods for each metal type.
- Carbon steel.
- Low-alloy steel.
- Stainless steel.
- Cast iron.
- Aluminum.
- Copper, bronze, and brass.
- Titanium
- Magnesium.
For higher accuracy, it’s best to obtain labeled metal samples and compare them to those you want to identify.
1. Identify metals by their appearance
The metal’s external appearance can give you quick information to identify or categorize the metal. From the appearance, you can observe:
- The color. While most metals are light gray more or less, others have pretty distinct colors. For example, copper is reddish, and brass is goldish.
- If there is corrosion or not. Metals react with oxygen and moisture, forming distinct colors and textures. For example:
- If there is rust, the metal is a ferrous (iron) alloy. The depth of rust also matters. Weaker steels such as mild steel develop deep rust, while stronger ones with more carbon rust at lower rates.
- Copper, bronze, and brass form multicolor green-blue corrosion.
- Other metals such as aluminum, titanium, and stainless steel, when exposed to air, form protective layers against corrosion.
- If there are characteristic coatings. With experience, you can recognize the zinc coating of galvanized steel or the chromium coating of bronze or zinc workpieces.
- How smooth the metal’s edges and surface are. For example:
- If the surface is polished like a mirror, it’s probably stainless steel.
- A fairly coarse and ugly surface indicates cast iron.
- The presence of casting lines around the metal indicates cast iron or cast steel.
- Surface cracks expose a hard and brittle metal, for example, cast iron or tool steel.
- The metal’s shape can also help. For example:
- Tool steel stock always comes in small sizes, either square, round, or flat bars.
- Large structural steels such as I-beams are low-alloy steel.
- Color coding. If the metal hasn’t been used after production, there may be traces of the color-coding imprinted on it. Color identification depends on the manufacturer.
- The interior. Finally, if you have a broken metal, you can observe the fracture. Apart from the color, you can see what grain size the metal has. For example, if it looks coarse, it’s cast iron.
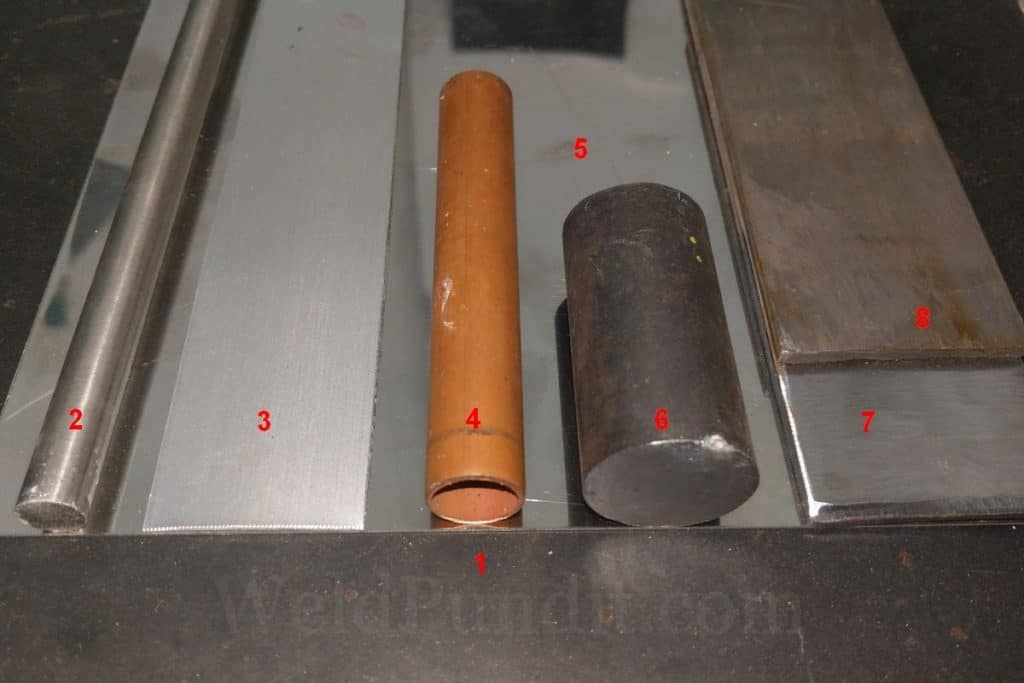
- Mild steel plate covered with mill scale
- Stainless steel bar
- Aluminum sheet
- Copper round tube
- Polished stainless steel sheet
- Medium-carbon steel bar
- Clean mild steel
- Dulled mild steel
2. Feel the metal’s weight
The metal’s weight is a quick way to distinguish between similar-looking metals. For example:
- Depending on the surface finish, stainless steel may look like aluminum but is much heavier.
- Magnesium may look like aluminum but it’s more lightweight.
- Titanium may look like stainless steel but weighs less than steel.
The following table shows the specific gravity of metals to see how metals compare by weight.
| Metal | Specific gravity |
|---|---|
| Magnesium | 1.74 |
| Aluminum | 2.70 |
| Titanium | 4.50 |
| Cast iron | 7.20 |
| All steels | 7.80 |
| Copper, brass, bronze | 8.90 |
| Nickel | 8.90 |
3. Hear the sound of the metal
Some metals make a pretty distinct sound. For example, bronze makes a bell-like noise. Hardened steels make a higher pitch sound than soft ones.
When you perform other metal identification tests, for example, grind, file, or chisel, sound can also help you identify it.
4. Consider the metal’s service conditions
The service conditions of the metal can give a lot of information about its nature. Some examples of service conditions are the following:
- If the metal is used for engine blocks, transmissions, etc., it probably is cast iron.
- Aluminum is likely to be used if corrosion resistance and lightness are needed, but not strength.
- A variety of low-alloy steels are used to provide exceptional resistance to many harsh environments, for example:
- A superficial and permanent layer of rust means the metal is weathering steel with chromium and copper.
- Pipes and valves that endure high temperatures are made from low-alloy steel that contains molybdenum.
- Most kitchenware and food containers are made from austenitic stainless steel.
- Most decorative stainless steel is ferritic stainless steel.
- Finally, stainless cutting tools are martensitic stainless steel.
5. Use a magnet on the metal
The magnet test is simple and easy but offers a basic categorization of the metals. If you have a welding magnet, you are ready to begin.
Most ferrous (iron) alloys attach strongly to magnets and often are pretty weldable. Examples of metals with strong magnetism are:
- Carbon steels.
- Cast iron.
- Low-alloy steels.
- Many stainless steel grades, but this means they are difficult to weld.
- Furthermore, some alloys particularly high on nickel can be magnetic.
However, some ferrous metals are barely magnetic or even nonmagnetic. Examples of metals with weak magnetism are:
- Austenitic stainless steels, such as the 304 and the 316 grades.
- Austenitic manganese steels.
- Most nickel alloys.
Most nonferrous metals are nonmagnetic and harder to weld. Examples of nonmagnetic metals are:
- Aluminum.
- Magnesium.
- Copper.
- Bronze.
- Brass.
- Titanium.
6. Do a hardness test
With a hardness test, you check how soft or hard the metal is. Metals offer a wide variety of hardness and ductility, depending on the metal’s carbon and alloying element content.
Hardness is the metal’s surface resistance to deformation, for instance, scratching it with a file. Ductility is how much the metal can bend without breaking. In most cases, these two characteristics are irreversibly proportional.
Each steel after production has a specific hardness that is relatively low. Steels with low hardness and high ductility, such as mild steel, are the easiest metals to weld.
However, welding steels with carbon higher than 0.40% is difficult because they can be hardened when you weld them. Without the proper welding procedure, they will crack.
When steel is already hardened, it is practically unweldable. That’s because the welding heat will alter the metal’s mechanical characteristics. However, with notably strict and troublesome procedures, you can join hardened steel to hold it together.
However, it will not serve its original purpose. Most welding jobs on hardened metals are about rebuilding worn surfaces with specialized filler metal.
A general categorization of steel hardness is:
- Soft steels such as wrought iron or mild steel.
- Steels with medium hardness, such as medium-carbon steel or low-alloy steel.
- Steels with high hardness, such as high-carbon steel or high-alloy steels.
- Finally, already hardened steels either high-carbon, high-speed, or martensitic stainless steel.
The following table shows the average hardness value of common steels and nonferrous metal alloys.
| Metal | Stock | Hardened |
|---|---|---|
| Magnesium alloys | 70 | |
| Aluminum 6061 | 100 | |
| Brass | 115 | |
| Bronze | 125 | |
| Nickel alloys | 150 | |
| Titanium alloys | 230 | |
| Mild steel | 135 | – |
| Medium-carbon steel | 180 | 270+ |
| Low-alloy steel | 200 | 320+ |
| High-carbon steel | 220 | 340+ |
| Tool steel | 260 | 600+ |
| Austenitic Stainless steel | 190 | – |
| Ferritic Stainless steel | 170 | – |
| Martensitic Stainless steel | 250 | 500+ |
| Malleable cast iron | 130 | |
| Gray cast iron | 260 | |
| Ductile cast iron | 170 | 300 |
| White cast iron | 450 |
If you got a broken metal, there is a fast way to tell how hard the metal is. The fractured surface of hard and brittle metals is flat and looks grainy. But the fractured surface of soft and ductile metals is slightly lengthened and deformed.
Hardness test methods
A hardness test is easy to do with simple tools such as a file, a hacksaw, or even better, a chisel and a hammer. Instead of a chisel, you can also use a center punch. However, a hardness test will damage the base metal even a little bit.
When doing a hardness test, you can see, hear and feel the results of the tool you use. Furthermore, it is an excellent opportunity to observe the metal’s interior color and grain size.
With a file, you observe the resistance of the metal against it. It will help if you do the test with two different files. A coarse file will cut soft steels easily but not harder steels. However, a finer file will cut hard steels easier.
- Soft metals will not offer resistance to both coarse and fine files.
- Metals with high-carbon content or high-alloy metals will require effort to file. However, the finer file will give better results.
- Hardened metals will completely resist filing attempts.
When you use a chisel and a hammer and try to dig into the metal and create shavings. You observe the effort you put into digging in the metal, the shape and size of the shavings or chips, and the results on the surface:
- If the metal is soft and ductile, the chisel will dig in with ease and create continuous metal shavings.
- With a medium-hard metal, the chisel will not dig so easily but will create long shavings.
- If the metal is hard but not hardened, the chisel will dig in with effort and create shavings.
- The chisel will barely scratch and bounce off hardened metal. These metals might be harder than the chisel itself. If the steel is that hard, you shouldn’t insist on hitting it. Fragments of hardened steel fly at fast speeds and are highly dangerous.
- If the metal is brittle but not too hard, it will chip off small fragments, for example, gray cast iron.
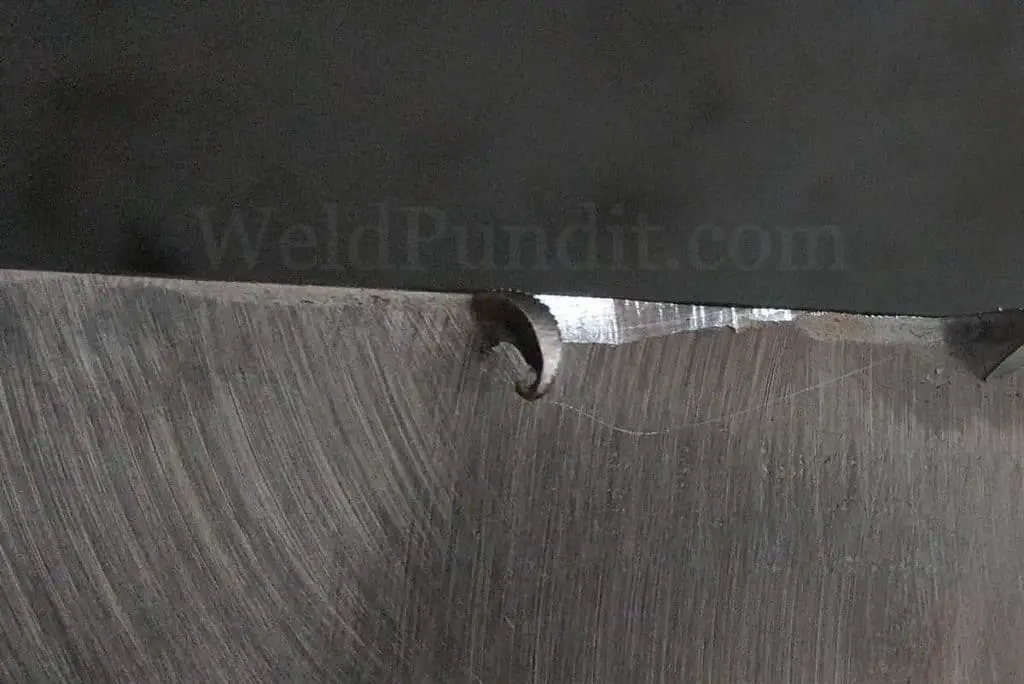
When chiseling metals, you should always wear safety glasses. Also, cover your skin to protect yourself from flying fragments.
7. Grind the metal to observe the sparks
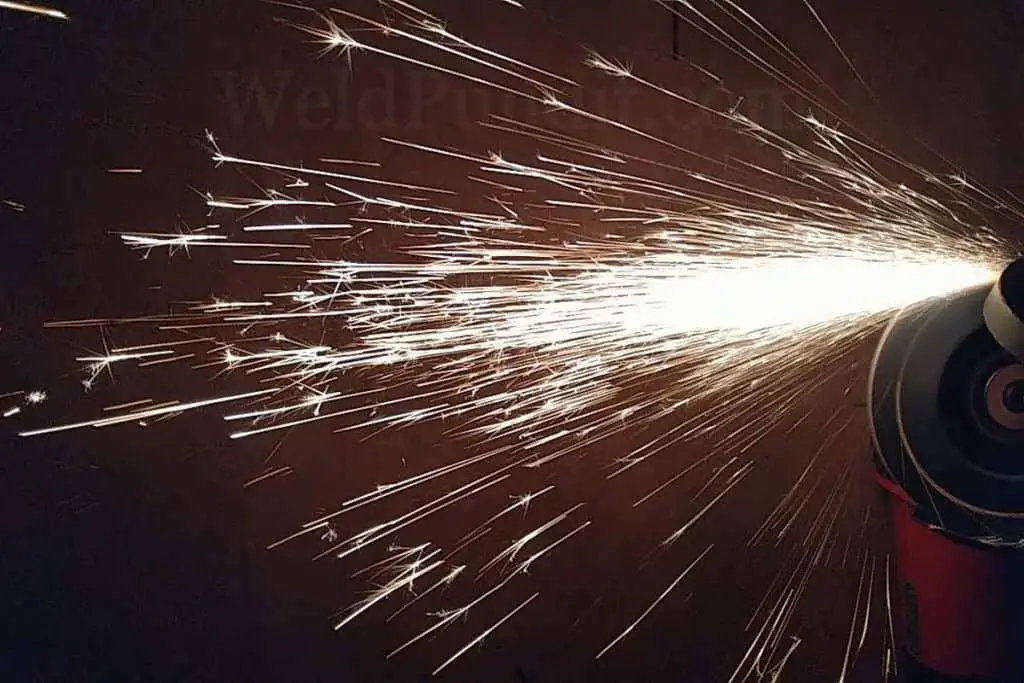
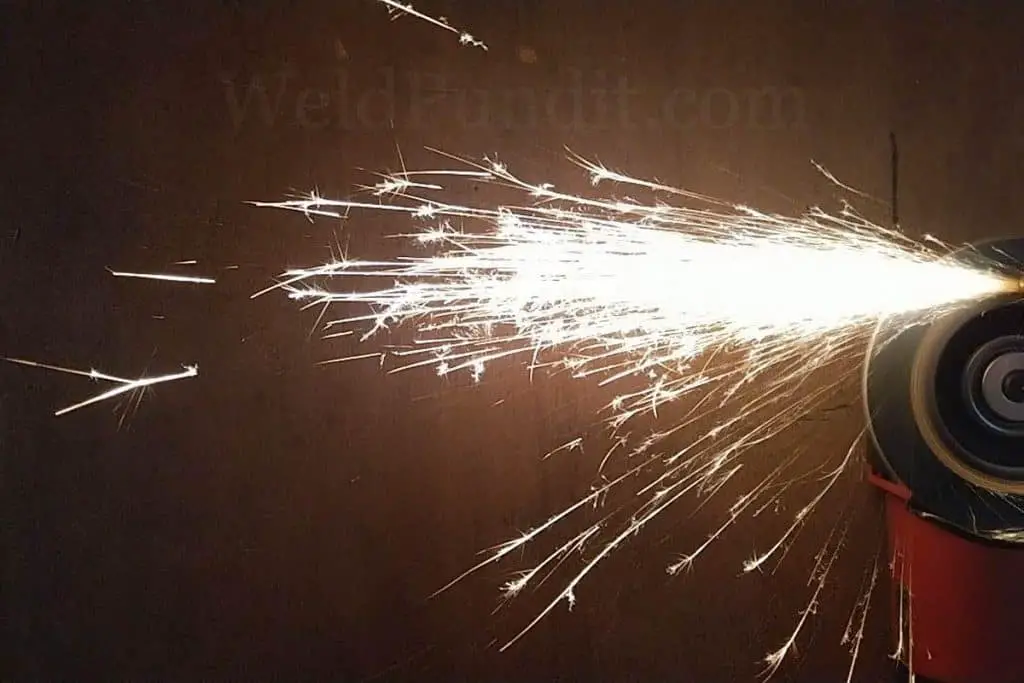
With a spark test, you identify metals by observing the sparks they create when you grind them. The spark test is quite reliable for steels. With enough experience, you can identify the metal and often the subtype.
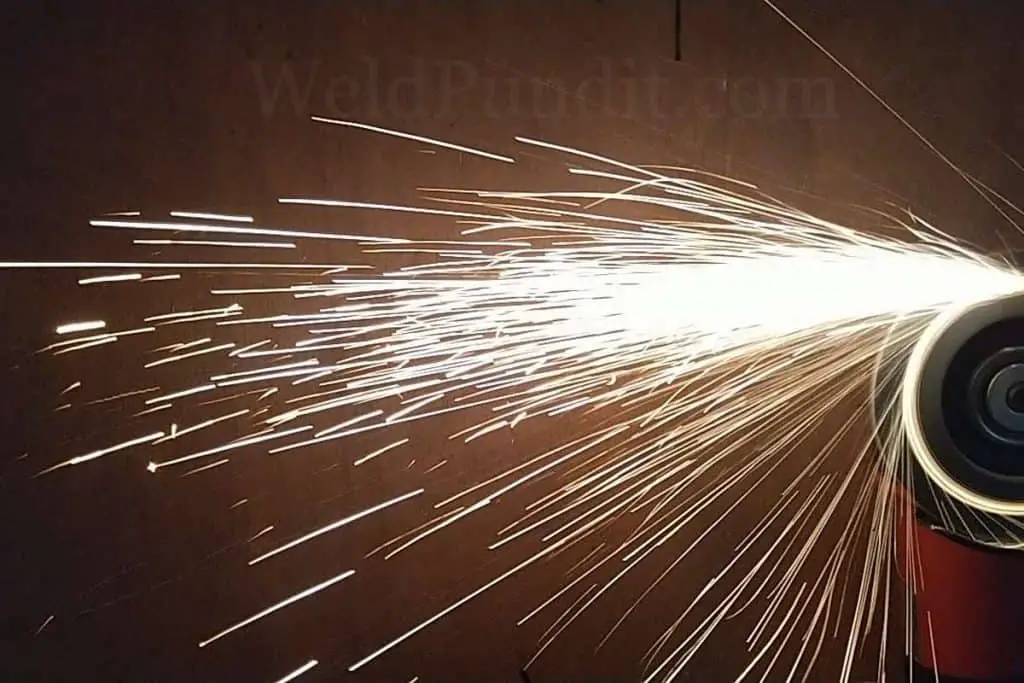
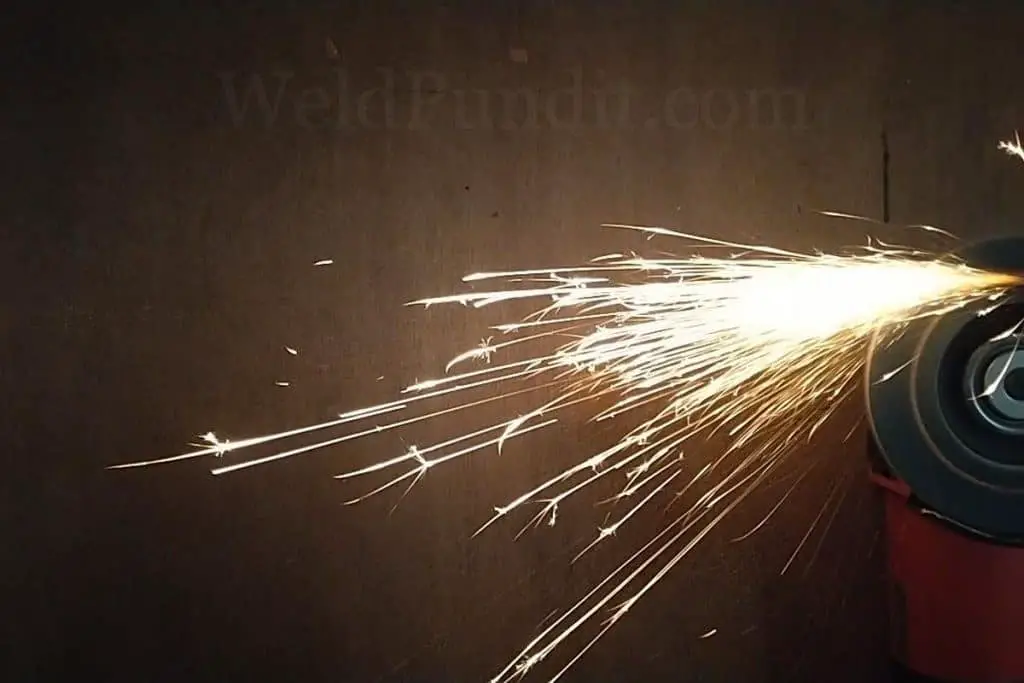
When performing a spark test, having identified metals to compare their sparks would be incredibly helpful. Keeping comparison charts or photographs of identified sparks nearby would also help.
A spark test is simple, since you only need a bench grinder with a grinding stone for steel. An unclogged 80-120 grain size stone is suitable.
The bench grinder is the easiest and safest option, but you can also use an angle grinder with a flap disk for steel.
For eye protection, wear safety glasses, and for even better protection from flying particles, it would help if you wear a full-face shield.
When performing a spark test, it would be best to use the same:
- Grinding wheel.
- Wheel rotation speed.
- Work angle.
- Metal surface size that touches the wheel.
- Pushing force. The sparks will be brighter and longer if the pushing force is greater.
What metals create sparks?
The spark test works great with ferrous metals. However, only a couple of nonferrous alloys create sparks. Metals that create sparks are the following:
- Carbon steels.
- Cast iron.
- Low-alloy steels.
- Stainless steel.
- Tool steels.
- Manganese steels.
- Titanium.
- Nickel alloys.
What metals don’t create sparks?
Most nonferrous metals don’t create sparks. Furthermore, it is dangerous to grind nonferrous metals such as aluminum with stones or wheels meant for steel. That’s because the stone will clog, concentrate heat, and there is a risk of shattering.
Some common nonferrous metals that don’t spark are the following:
- Aluminum.
- Magnesium.
- Copper.
- Bronze.
- Brass.
What to observe when doing a spark test?
Ensure you have a clear view of the spark stream. It would be best to have a dark background or dimmer light to see the sparks with higher contrast. Try to observe it from the grinding wheel until the sparks vanish. Focus and observe the:
- Color.
- Length.
- Shape.
- Density.
- Ending pattern.
When sparks end, they form a pattern that may look like forks or leaves, or in the case of cast iron stars.
Sparks depend on the metal composition and not on the metal’s hardness. For example, when identifying unalloyed carbon steels, sparks show you the carbon content.
However, additional alloying elements change the spark’s appearance. For example, low-carbon and low-alloy steel may have the same carbon content but create quite different sparks.
Sparks of unalloyed carbon steels
When carbon steel is low on carbon, the sparks are yellowish, long, irregular, and create only a few forks. Sparks become brighter, shorter, denser, and with frequent forks as carbon content rises.
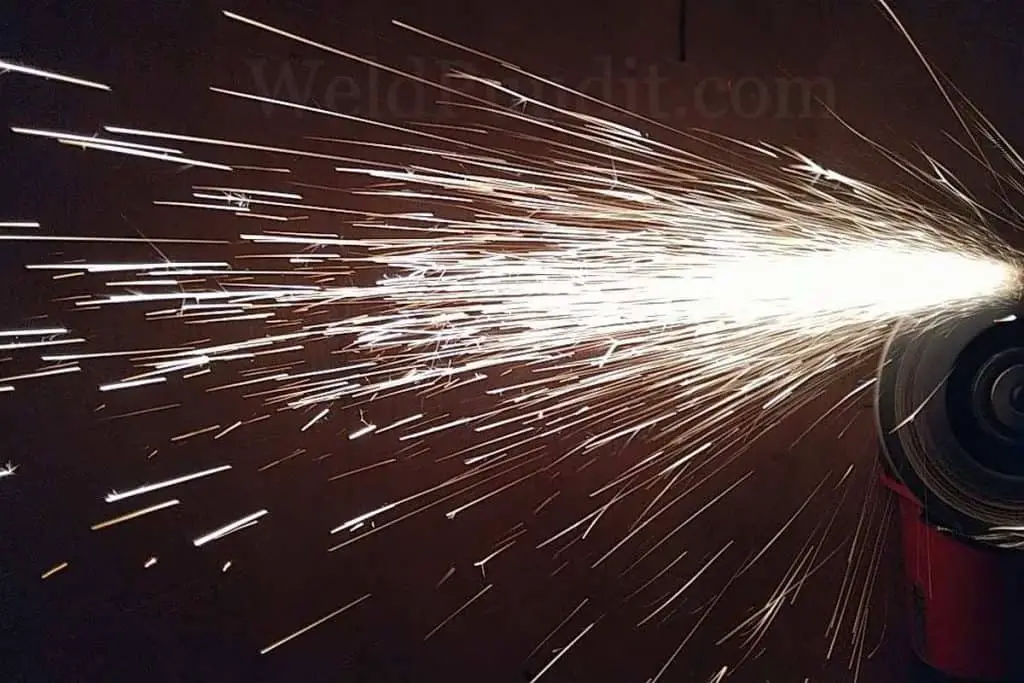
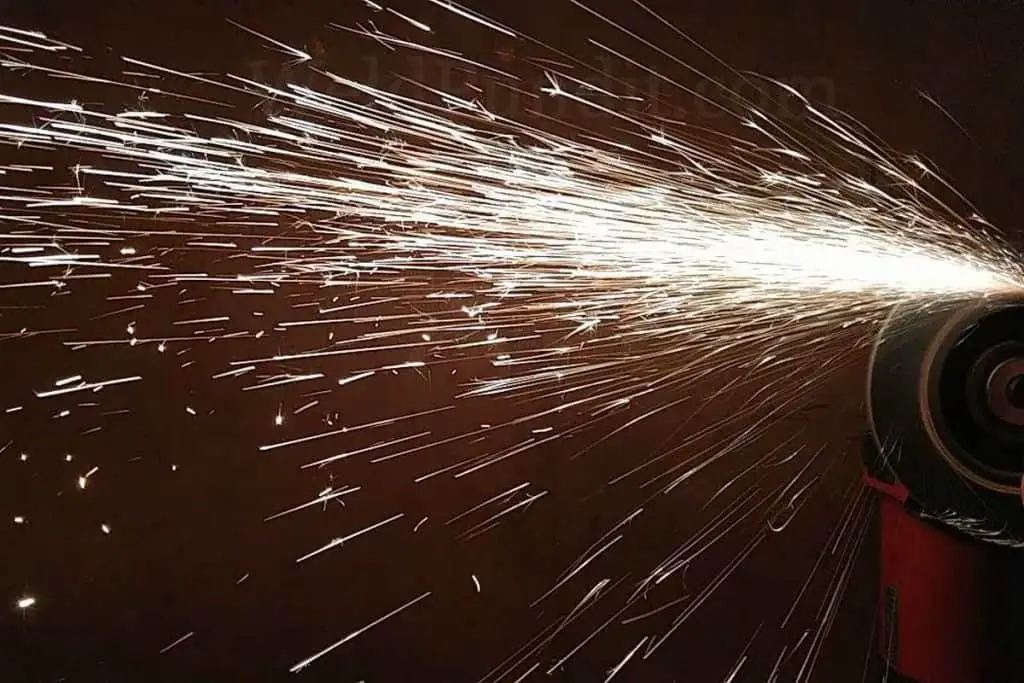
Sparks of alloy steels
The sparks of low or high-alloy steels depend on the combination of all the alloying elements, not only carbon. Each element changes the length, density, color, and ending patterns of each alloy steel.
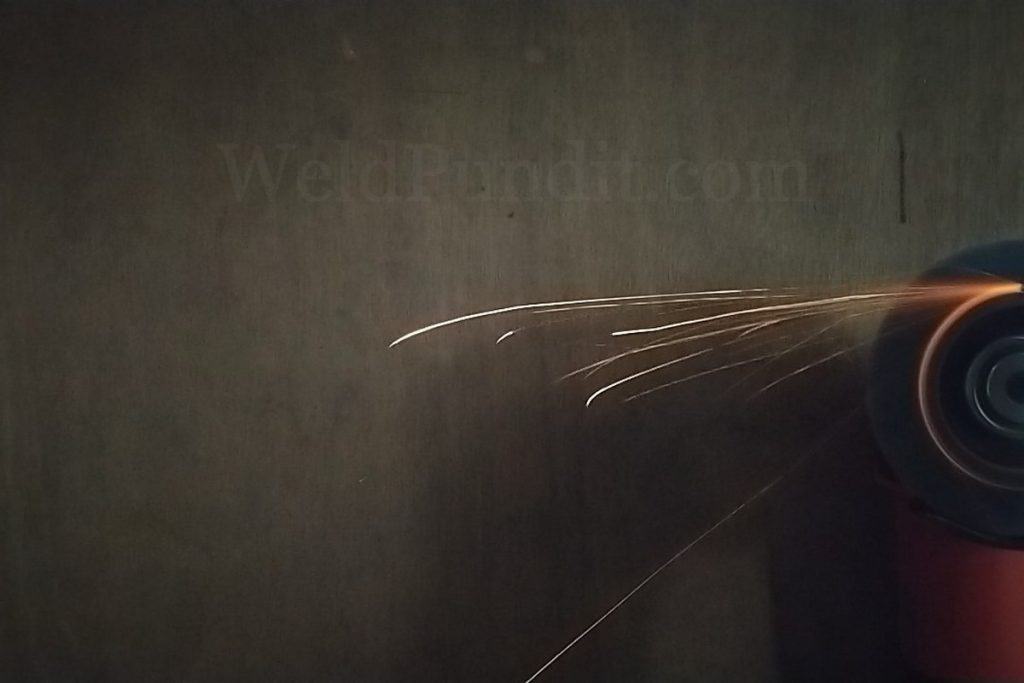
Additionally, when you do a spark test, there will be a few metal fumes, and you will smell them. High-carbon steels have a distinct and strong smell. However, even when you grind, it would be best to wear a welding respirator.
Furthermore, you can observe the sound and the resistance the metal has against grinding.
8. Use oxyfuel equipment to identify the metal
If you have access to oxyfuel equipment, there are several ways to use it and identify metals.
Try to cut the metal
You can test the cutting effect on a small metal part to identify the metal. However, the oxyfuel cutting (OFC) process cuts only unalloyed steels, such as mild and high-carbon steel and low-alloy steels.
If oxyfuel cannot cut the metal, it may be:
- A nonferrous metal.
- All high-alloy steels such as stainless steel and tool steel.
- Cast iron.
- Nickel steel.
Furthermore, oxyfuel testing helps distinguish between steels that are nonmagnetic but have different compositions. For example, oxyfuel will cut austenitic-manganese steel but will not cut austenitic stainless steel.
Observe the heat’s effect on the metal
When you use the oxyfuel cutting test, you can observe the heat’s effect on the metal. Ideally, you heat only a specific spot on the metal for this test. With enough experience, you can tell a lot about the metal’s nature from:
- The time the metal needs to melt.
- The fluidity of the molten metal.
- The time the metal needs to solidify.
- The various colors during the procedure.
Do a hardness test with oxyfuel
If possible, you can heat a fragment or a small part of the metal to red-hot. Then, immediately quench it into water. After that, you use a file to test this spot.
If filing gives the same results, the metal isn’t hardenable. Otherwise, if the resistance against the file has increased, the metal is hardenable.
Limitations of oxyfuel testing
Oxyfuel is not very helpful or even dangerous for some nonferrous metals, for example:
- You can identify lead because it melds fast, but it is hazardous to inhale the fumes.
- If you have a lightweight metal, it would be best not to oxyfuel test it. If it is magnesium, you could start a dangerous metal fire.
9. Do a flame test
A flame test is useful to identify lightweight flammable metals, such as aluminum and, even more, magnesium.
If you try to unknowingly weld or hot-cut magnesium, you will end up with a metal fire. Metal fires will not extinguish without the proper class D fire extinguisher.
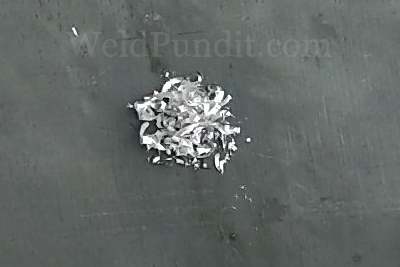
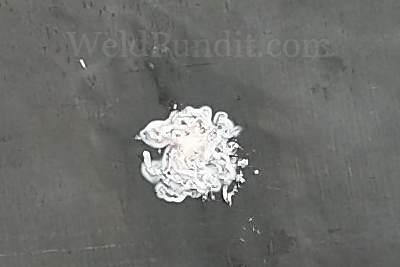
To do a flame test, you file a small part of the metal, gather the shavings and bring them in contact with a flame.
10. Do simple chemical tests
There are chemical tests you can use to identify metals and have great results. With a chemical test, you can distinguish between metals that are corrosion resistant or not. Most chemical tests need strict safety protection from vapors and skin contact.
For example, use an eyedropper to place a single drop of copper sulfate or diluted nitric acid on the metal’s clean surface. If it is stainless steel or titanium, nothing will happen. However, if the metal is carbon steel, it will change color.
11. Use metal identification kits
Metal identification kits are specialized chemical or electrochemical kits to identify metals. They offer flawless identification, versatility, and portability.
Simple identification kits can identify specific metals. More advanced kits identify a wider variety of ferrous and nonferrous metals, their grades, and coatings.
These kits are for professional work, are expensive, and their consumables have an expiring date.
Now let’s see the most common metals and how to identify them.
How to identify carbon steel
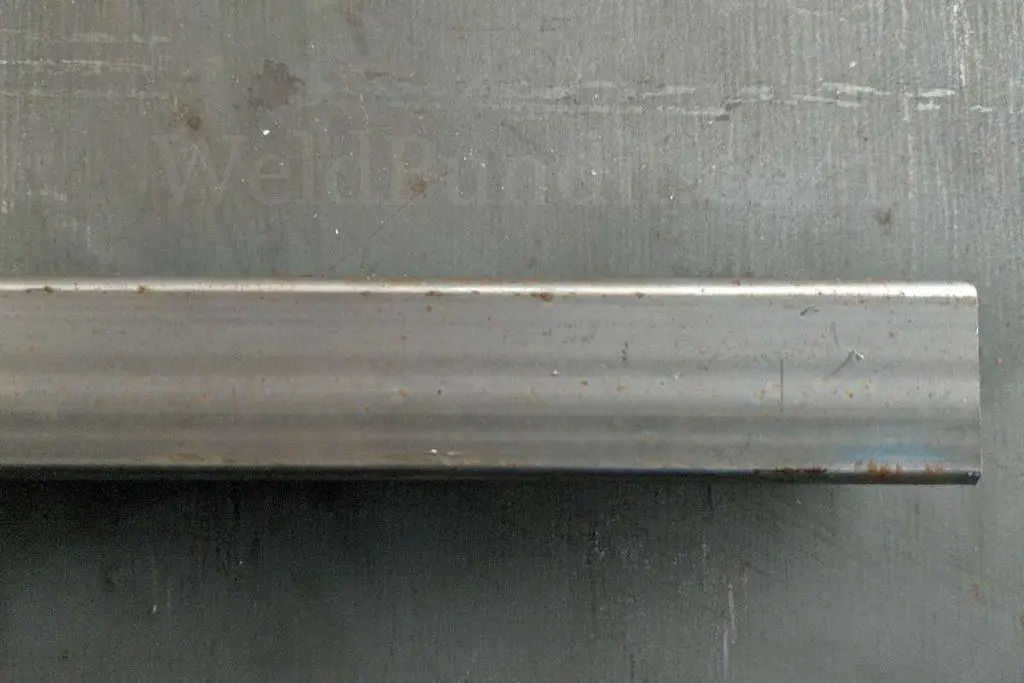
All carbon steels have a dull gray color, are heavy, highly magnetic, oxyfuel can cut them, and rust. Most types are covered by mill scale.
Low-carbon steel
The best methods to identify mild steel are:
- Hardness test. Mild steel is filled and chiseled easily and gives smooth and long shavings.
- Spark test. The sparks of mild steel are many, long with irregular size, a light yellow-orange color, with few forks at their endings.
If low-carbon steel comes as hot-rolled, it’s easy to identify because it has a black-bluish coating called mill scale. Furthermore, the edges are not sharp, and the surface is somewhat harsh. The A36 is a popular type.
As cold-rolled steel, there is no mill scale. It looks shiny-gray and is covered with oil to prevent rust. Furthermore, it has precise dimensions with sharp edges and flat surfaces. The 1018 is a popular type.
Medium-carbon steel
The best methods to identify medium-carbon steel such as the 1045 are:
- Hardness test. You cannot file medium-carbon steel as easily as mild steel. The chisel will give continuous shavings with effort.
- Spark test. The sparks of medium-carbon steel are almost identical to mild steel sparks, but create more forks.
High-carbon steel
The best methods to identify high-carbon steel such as the 1085 are:
- Appearance. The interior of high-carbon steel has finer grains and a brighter gray color than the previous steels.
- Hardness test. Carbon steel is tough to file or chisel, and once it has been hardened, it is impossible to do so. A chisel might only scratch or bounce off the surface. When doing a hardness test on this steel, there is a risk of damaging the tools.
- Spark test. This steel’s high-carbon content creates easy-to-identify sparks. The sparks are shorter, denser, more complex, much brighter, and create far more forks than those of mild steel. Furthermore, during this test, you will be able to smell the high carbon content.
How to identify low-alloy steel
Low-alloy steels are low or medium-carbon steels with a 1-10% addition of alloying elements. The weathering A242 or corten A steel is a typical example.
You can file most low-alloy steels without much effort, but several grades are even harder than medium carbon steel.
The sparks of low-alloy steels vary according to the additional elements, even if the carbon content is the same. Generally, low-alloy steel sparks are short, dark orange, with a few forks.
The best methods to identify low-alloy steels are:
- Spark test. Compare the sparks with labeled sample metals.
- The service conditions. Many low-alloy steels have specific uses, for example:
- Weathering steels that create a superficial and permanent layer of rust that protects the steel.
- Steel that contains chromium and molybdenum for pipes and valves used for hot steam.
- Steel that contains nickel for tanks that hold materials at freezing temperatures.
- Identification kits are costly but give guaranteed results.
How to identify stainless steel
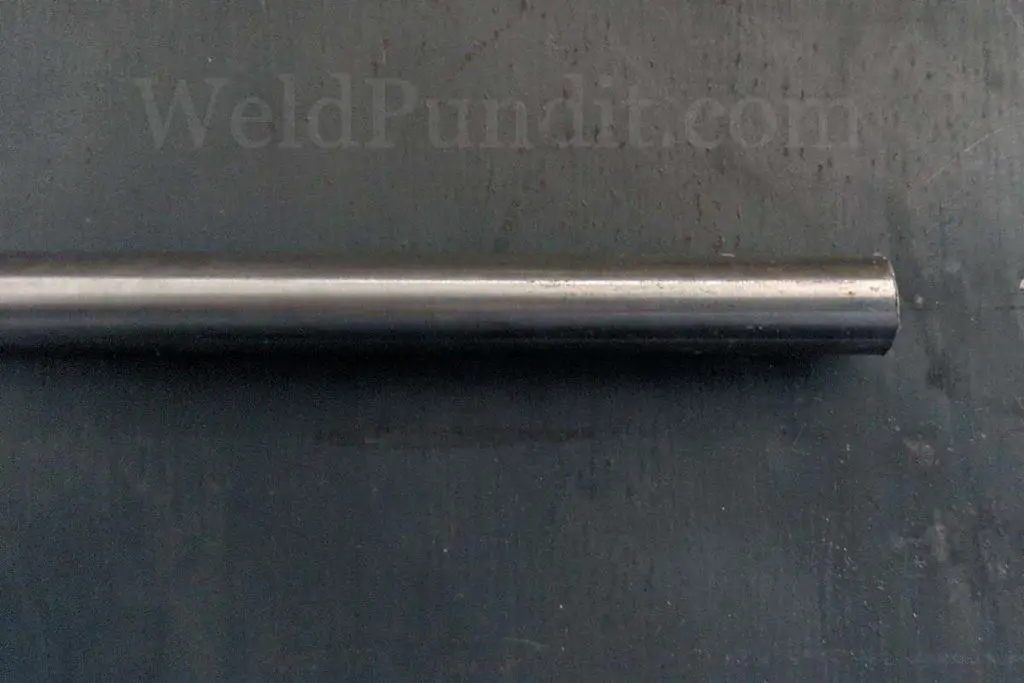
Stainless steel is high-alloy steel with at least 10.5% of chromium, among other alloying elements. Chromium combines with oxygen and creates a protective layer on the surface that protects the metal from corrosion.
The quickest way to identify stainless steel is by its appearance. It has a matt-gray color with no signs of surface corrosion (under typical usage). Polished stainless steel has a distinct mirror-like surface.
Stainless steel is harder to file or chisel than mild steel, but just as heavy. The weldability, hardness, sparks, and magnetic behavior of stainless steel depend on each type. In most cases, the sparks of stainless steel are long, light yellow, and with a few forks.
There are three basic types of stainless steel:
Austenitic
The easiest way to identify austenitic stainless steel from the other types is to use a magnet. If the magnet does not stick or is barely magnetic on stainless steel, it is austenitic. Probably the 304 grade.
Ferritic
If the magnet sticks, the next step is to see how hard the metal is. If you can file it or chisel it, then it is ferritic. Probably the 430 grade.
Martensitic
Finally, it’s martensitic if the magnet sticks and the metal is troublesome or impossible to file or chisel. Probably the 410 or the 420 grade.
How to identify cast iron
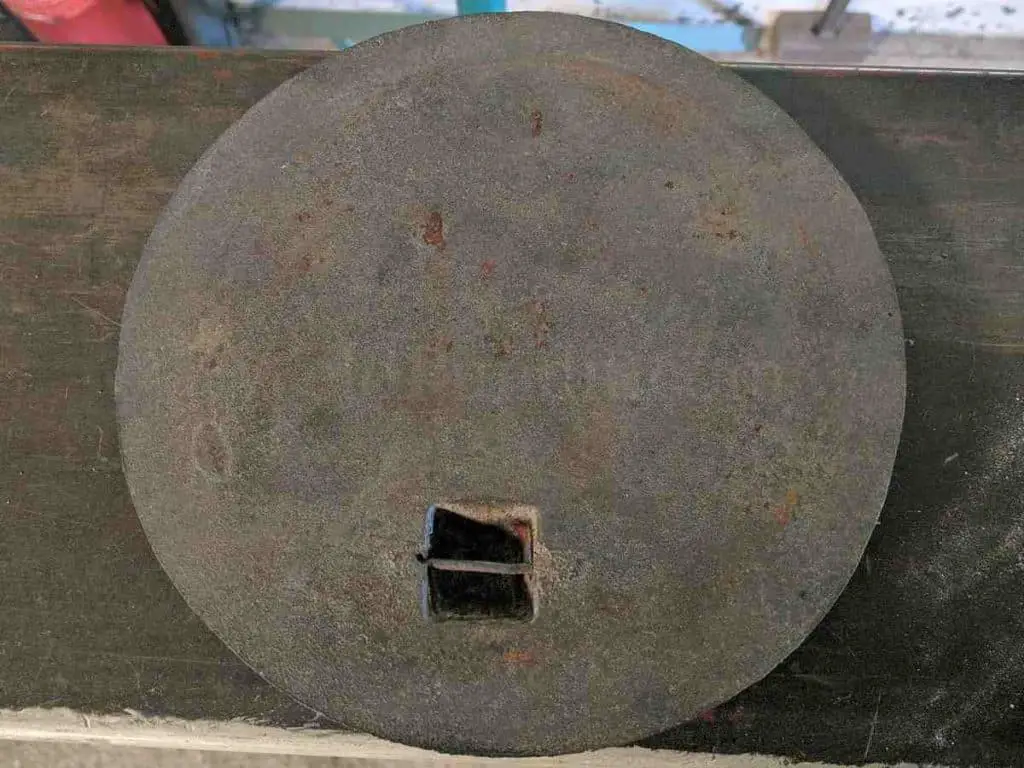
Cast iron is an iron alloy with the highest carbon content of 1.7-4%. Cast iron is heavy, magnetic, and rusts. The best methods to identify cast iron are:
- Hardness. Prefer the chisel test because instead of shavings, cast iron gives characteristic fragments. However, if the chisel doesn’t chip off fragments but bites into the metal, it is not cast iron but cast steel.
- Sparks. Cast iron creates sparks that are short, start reddish but later become dark yellow, and form stars. Each type has slightly different sparks.
- The service conditions. Because cast iron is perfectly rigid, it’s suitable for engine components, transmissions, gearboxes, etc.
- The shape. This metal forms in cast shapes. That will create visible casting marks around it.
- The surface. Finally, cast iron looks coarse and “ugly” and often has absorbed oils.
Now, let’s see the common cast iron types:
Gray cast iron
Gray cast iron is popular and weldable if you follow the proper procedure. The surface and a freshly broken part have a dull dark-gray color caused by the excess carbon and look really grainy.
You can file the surface, and if you chisel it, small fragments will chip off. The sparks of gray cast iron are short, dark yellow-red, ending in many star patterns.
Malleable cast iron
Malleable iron looks less gray and isn’t as coarse. It’s softer and less brittle.
You can file malleable iron, but it is harder to chisel than gray iron. The resulting fragments are larger. The sparks are longer but simpler than gray iron sparks.
White cast iron
White cast iron is the hardest and most brittle one, and practically unweldable. The surface looks silvery-white, and it’s not as coarse as gray iron.
White iron is extremely hard to file or chisel. The sparks are fewer, shorter, whiter, and less complex than gray iron sparks.
Ductile cast iron
Ductile cast iron or SG iron is the newest type. When chiseled, ductile iron will raise a burr when other cast irons leave a flat surface. As a result, the removed material from ductile iron will resemble shavings instead of small fragments.
The ductile iron sparks are longer, have a less reddish color, and have fewer star patterns than the previous types.
Now let’s see how to identify the nonferrous metals.
How to identify aluminum
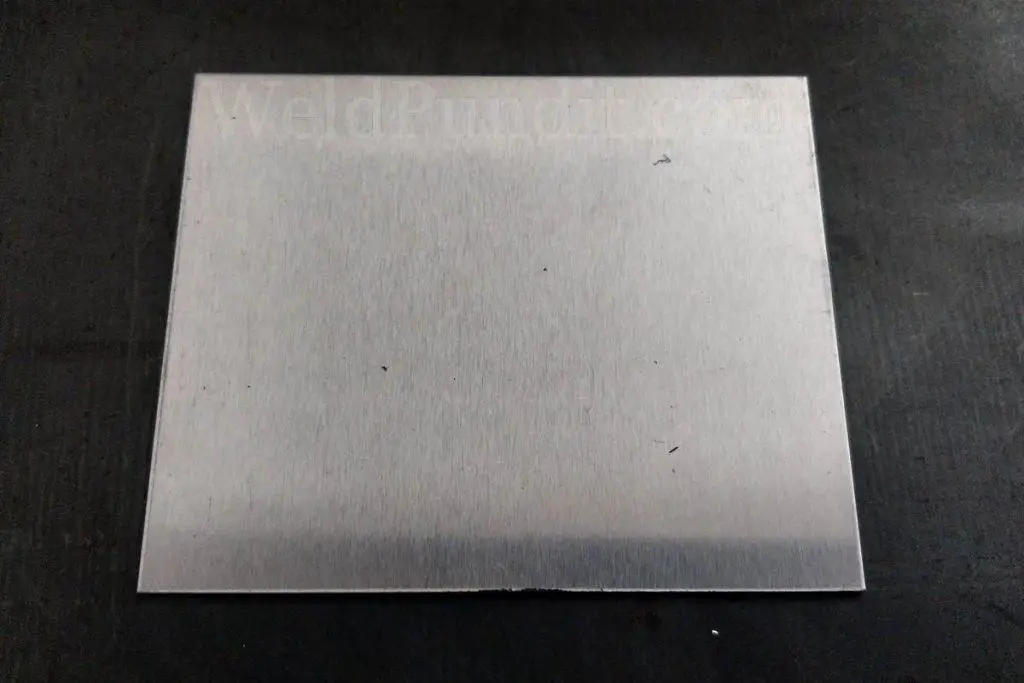
Aluminum is a popular metal but tough to weld. It’s easy to identify from other metals, but difficult to identify between each aluminum alloy.
Aluminum has a light-gray color, somewhat similar to unpolished stainless steel. It doesn’t rust or form other noticeable corrosion. Keep in mind that it may be colored by anodization. Furthermore, it’s nonmagnetic and sparkless.
The best methods to identify aluminum are:
- The weight. Aluminum is at least two and a half times lighter than steel.
- Low hardness. If you file or chisel aluminum, you will see it is a soft metal, and the shavings will have saw-like edges.
- Chemical test. If you pour a few drops of caustic soda on aluminum, it will shift to a darker color. With suitable chemical kits, you can identify each type.
- Aluminum is nonmagnetic.
How to identify copper, bronze, and brass
Copper and the two main alloys, bronze, and brass are nonmagnetic, sparkless, heavy, and softer than steel. Their surface becomes dull when exposed to air, and under prolonged moisture exposure, they form a green-bluish protective layer called patina (Wikipedia).
The best methods to identify these metals are:
- By filing these metals and looking at their color.
- They make a distinct bell-like sound when you hit them.
- They give small shavings with saw-like edges if you use a chisel.
Copper
Filed copper has a red-orange color that will turn to a dull red-brown when exposed to air. Copper’s patina has more blue compared to the alloys. If you chisel copper, you will see that it is much softer than the two alloys or mild steel.
Bronze
Filed bronze has a yellow-brown color that will turn dull brown. Given enough time, the color will turn into a characteristic greenish multicolored patina. Bronze is often coated with chromium and looks like polished stainless steel.
Brass
Brass is the easiest to identify because of its brighter color. Filed brass has a beautiful goldish color that will turn dull yellow. If brass develops a patina, it’s somewhat bright, brownish, without much green in it.
How to identify titanium
Titanium is a light-gray metal, is lightweight, and has superb corrosion resistance. There will be no corrosion on the surface. The best methods to identify titanium are:
- The sparks. Although titanium is nonferrous, it produces recognizable short and very bright white sparks.
- The lightweight. Titanium weighs 40% less than steel.
- The hardness. For a nonferrous metal, titanium is quite hard.
- Titanium is nonmagnetic.
How to identify magnesium
Magnesium is the lightest metal. It has a dull gray color, comes in casting forms, is soft and brittle, doesn’t create sparks, and isn’t magnetic. If you create magnesium shaving or dust, you must be careful because they are flammable.
The best methods to identify magnesium are:
- Chemical test. Many soft acids react instantly with magnesium. You can drop, on a clean surface, a few drops of vinegar. If there is a reaction, it is magnesium.
- Flame test. You can also do the flame test described earlier. If the shavings spark and burn, it’s magnesium.
- The weight. Magnesium is the lightest metal.
- Softness. It is characteristically soft, you can create shavings with any cutting tool.
In a nutshell
Identifying metal is troublesome at first, but it’s worth the time to acquire this skill quickly. Always have a collection of identified and labeled metals to compare them with the unknown ones. Finally, when you obtain or identify a metal, always mark it.
The most practical and basic methods to identify metals for welding are:
| Metal | Identification | Beginner friendly |
|---|---|---|
| Low-carbon steel | Sparks, softness, rust | Best |
| Medium-carbon steel | Sparks, rust | Medium |
| High-carbon steel | Sparks, hardness | Low |
| Austenitic stainless steel | No corrosion, appearance, nonmagnetic | Medium-high |
| Ferritic stainless steel | No corrosion, appearance, magnetic, hardness | Medium-low |
| Martensitic stainless steel | Appearance, magnetic, hardness | Low |
| Low-alloy steels | Spark test with identified metals, service conditions. | Medium |
| Tool steels | Spark test with identified metals, service conditions. | Low |
| Hardened metals | Hardness, service conditions | Lowest |
| Cast iron | Chisel and hammer, appearance | Low-medium |
| Aluminum | weight, softness | Low-medium |
| Bronze, Brass | color, sound | Low |
| Titanium | Sparks, weight, hardness | Low |
| Magnesium | Weight, flame test, acid test | Low-medium |
More Weldpundit articles

